


Get Il Buco's recipe: rustic Italian Olive Sourdough Loaf
a bread that will hijack your salivary glands

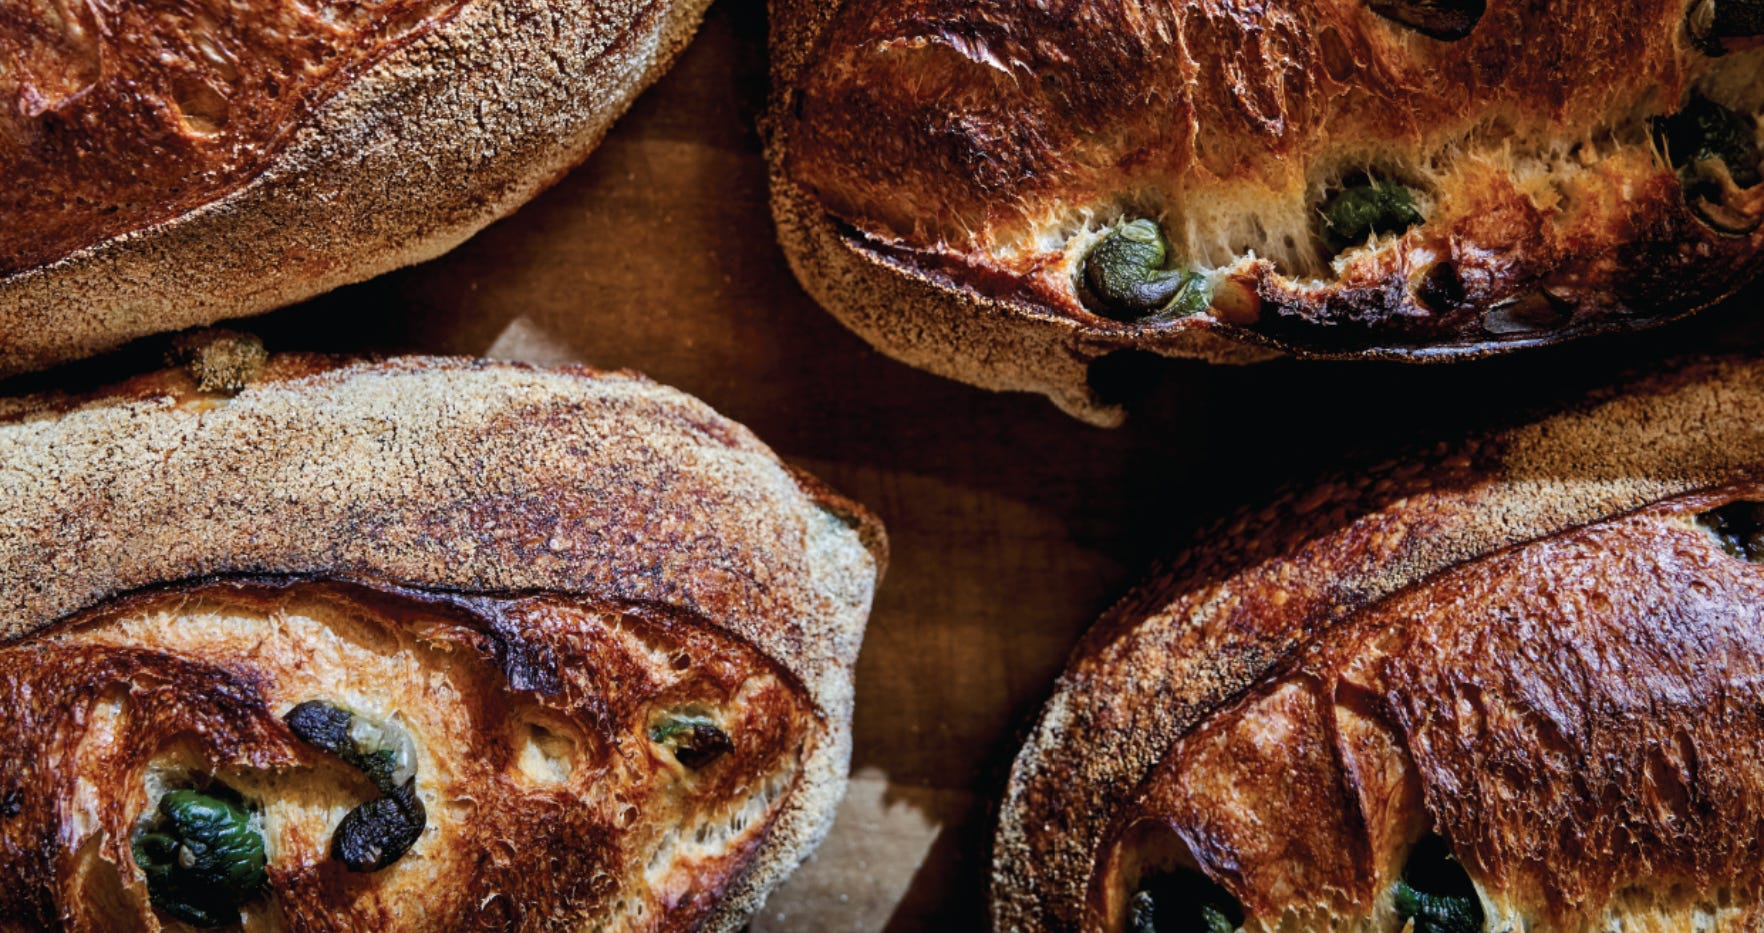
Filone (“loaf” in Italian) is a sourdough bread with a rustic, crisp dark crust and a light crumb. The filone in this recipe - from NYC restaurant Il Buco Alimentari & Vineria - has a softer, less tangy profile than the early breads of the San Francisco bread scene that inspired it. It’s wonderful for sandwiches and crostini, and keeps well for several days after baking. While traditional filone is oval, for the home baker, we suggest a round boule shape for baking in your dutch oven.
This loaf is studded with Castelvetrano olives; green, firm, and sweet with that classic bitter olive tang in the finish. The addition of the olives slightly alters the consistency of the loaf, creating a wonderful chewy texture rich with earthy flavor.

Recipe difficulty rating: advanced
Ingredients: (serving size: 1 loaf)
For the sourdough starter:
350 grams organic spelt flour
200 grams all-purpose flour
200 grams whole wheat flour
cool tap water
For the olive loaf (once your starter is ready):
150 grams sourdough starter
500 grams all-purpose flour, plus additional for kneading as needed
350 grams room temperature water
12 grams fine sea salt
Oil, for greasing the bowl
Semolina flour, for dusting
200 grams pitted Castelvetrano olives, roughly chopped
Cooking Appliances:
stand mixer with dough hook attachment (preferred) or plastic bowl scraper
proofing basket
spray bottle
5-quart dutch oven with lid

Instructions:
To make your sourdough starter:
Day 1: Starting the Starter
50 grams organic spelt flour
50 grams cool tap water
Mix above ingredients by hand in a small bowl, scrape down the side, and cover with plastic wrap and leave overnight at room temperature.
Days 2 to 7: Refreshing the Starter (Stage 1)
Sourdough starter is alive, and just like all living things, needs “feeding,” which you will do by refreshing it daily in this stage (taking a small amount of your bubbling starter mixture and mixing in a proportionate amount of flour and water). Refreshing the starter provides a food source that will keep the wild yeast alive and multiplying. In this stage, every day that the starter shows activity, you need to refresh it. As long as the starter smells reminiscent of a food (cheese, yogurt, bread, slightly alcoholic) it is safe to continue. Sometimes your starter will develop a thin brownish or graying liquid on top. This liquid is just a fermentation by-product; it should be drained and discarded, and will not have a negative effect on your starter.
If there is no activity on day 2, let the starter sit for another day at room temperature. By day 3 or 4, you should begin to see signs of activity in your starter: at first your starter will begin to bubble, then it will begin to rise, and finally as it reaches its peak and is ready to refresh, “soapy” bubbles begin to collect in the center of the starter and the center starts to dip. This means the starter has exhausted its food supply and needs to be refreshed with new flour and water.
Whether or not your starter is showing activity by day 4, you should refresh it according to this stage 1 recipe below. The remainder of the starter will be discarded. Be sure to monitor the smell of your starter, if your starter begins to smell like something you would NOT eat (paint thinner, rotting garbage), the microbiotic activity in the starter has tipped in the favor of harmful bacteria, and you should discard it and begin again.
Stage 1 Refresher:
50 grams sourdough starter mixture*
50 grams organic spelt flour
50 grams water
Mix these ingredients by hand in a small bowl, scrape down the sides, cover with plastic wrap, and leave overnight at room temperature. Continue to refresh daily with above recipe through day 7.
Days 8 to 13: Refreshing the Starter (Stage 2)
As you did in days 2 to 7, check the starter each day for activity. Once you notice your starter is bubbling and rising regularly between refreshings, it means some natural yeast has cultivated and the starter needs a different recipe to grow for its use in baking. This is stage 2, and you will follow this recipe for days 8 to 13.
You’ve gotten to know your starter pretty well by now, and are probably able to anticipate the time it needs between refreshings (bubbling and rising are the indicators). The timing of this will depend on many factors (climate, humidity, etc.) so follow the lead of your particular starter.
In stage 2, the starter begins to become more active, so it will need refreshing more frequently. If you don’t want to wake in the middle of the night to complete multiple refreshings, you can refrigerate your starter to retard it; to do this, put it in the refrigerator after half the time it normally takes for it to reach its peak height or activity so that you still only have to refresh it once daily. For example, if your starter is ready to refresh after 12 hours at room temperature, refrigerate it after only 6 hours at room temperature, then leave it in the fridge for 18 hours (or up to 24 hours if more convenient). Then refresh it the next day.
Stage 2 Refresher:
50 grams sourdough starter mixture*
50 grams water
25 grams all-purpose flour
25 grams whole wheat flour
During days 8 to 13, refresh your active starter every day (it could be more often if you live in a warmer climate). Mix the above ingredients by hand in a small bowl, scrape down the sides, and cover with plastic wrap or a plate as a lid. Leave overnight at room temperature, or refrigerate as needed to slow the process (see above).
Day 14: Finalizing the Starter
By day 14, your sourdough starter should be bubbling and active and rising consistently between refreshings. If not, continue to refresh the starter using the recipe and techniques in stage 2 until you notice these patterns developing. Once your starter has reached this predictable pattern, you’re ready for this step.
100 grams water
50 grams sourdough starter mixture*
50 grams all-purpose flour
50 grams whole wheat flour
Mix the above ingredients by hand in a small bowl, scrape down the sides, and cover with plastic wrap or a plate as a lid. Leave at room temperature until the starter has risen to its peak, and has begun to slightly depress in its center, the way it does when it is ready for refreshing. When this occurs, transfer the starter to the fridge.
The next day, day 15, the starter will be ready to bake bread.
Be sure to retain the remaining amount of starter for future use. This is to continue the life of your sourdough starter without having to begin again from day 1. For as long as you keep the starter, it will now need refreshing once a week using the recipe from stage 2.
Sourdough Starter Notes:
For the first 13 days of creating your starter, you should discard the unused amount every time you refresh your starter. After Day 14, when your starter is active and ready for baking, you can feel free to use the leftover portion of your starter (sourdough discard) from your recipe for other baking projects, such as pancakes, or to make additional loaves of bread.
If your local water is chlorinated—as it is in New York City—just leave it out on the counter for an hour so that all the chlorine dissipates. You may also use distilled water, especially if you live in an area with particularly hard water.

Once your sourdough starter is ready, assemble your dough:
Combine 500 grams all-purpose flour, 350 grams room temperature water, and 150 grams sourdough starter in the mixing bowl of a stand mixer, and, using the dough hook attachment, mix on the lowest speed for 5 minutes. Alternatively, mix in a large bowl by hand until you do not see any remaining bits of flour and the dough transforms from a shaggy mass into a smoother mass; this will take between 5 and 15 minutes.
Once the dough has collected into a loose, somewhat cohesive mass, scrape down the sides and the bottom of the bowl for any floury bits. Increase the mixer speed to medium and mix for another five minutes. (If making by hand, turn dough out onto a lightly floured countertop and continue to knead for another 5 minutes.) Place the dough in a lightly oiled bowl. Cover the bowl loosely with a kitchen towel and let the dough rest for 30 to 45 minutes.
After the resting time, put the dough back in the mixer, sprinkle the dough with 12 grams of fine sea salt, and mix on the lowest speed of the mixer for a minute or two, until you cannot see or feel any granules of salt. (If mixing by hand, sprinkle the salt on top of the dough and “cut” the salt into the dough using a bowl scraper. Knead the dough for 5 minutes, or until you cannot see or feel any salt granules remaining.)
Put the dough on a lightly floured surface and let it rest for 20 minutes.
Once the dough is rested, sprinkle 200 grams pitted, roughly chopped Castelvetrano olives over the dough and knead by hand until the olives are evenly incorporated throughout the dough.
Shape into a round, and place into a lightly oiled bowl. Cover the bowl with a kitchen towel and place in a draft-free, preferably warm corner of your kitchen to proof. The dough will not double in size; you’re looking for about a 25 percent increase in volume, and the dough should feel “puffy” and “relaxed” prior to shaping. Depending on the temperature of your kitchen, this can take anywhere from 2 to 6 hours.
Once proofed, remove the dough from the bowl onto a well-floured countertop and gently de-gas the dough by patting it out and popping any large bubbles. Shape into a round by folding the dough over itself, picking up the top edge, and pulling it just over the center of the dough, then, using the heel of your hand, push the dough slightly away toward the top edge. Now turn the dough counterclockwise 90 degrees and do the same thing three more times; the dough should be round and smooth. Turn the dough over and tighten the boule by gently pulling the dough toward you, using the slight friction between the dough and your countertop to further tighten the dough. Turn the boule 90 degrees and repeat three more times. Place the boule seam side up (top side down) in a proofing basket lined with semolina flour to prevent sticking. Sprinkle more semolina over the top. Loosely cover with a kitchen towel and refrigerate overnight, anywhere from 12 to 24 hours.
When ready to bake, preheat the oven to 450°F; put an empty 5-quart dutch oven with its lid on to preheat as well.
Once your oven and pot are preheated, remove the dough from the refrigerator and carefully turn it out from the basket into the dutch oven. Score the top of the dough using a sharp paring knife in any pattern you like. Using a spray bottle, spray the dough with a little water, cover with the dutch oven lid, and place entire vessel in your oven. Bake for 20 minutes.
Remove the lid and continue to bake for 20 to 30 minutes, or until the crust is a deep golden brown.
Let bread cool completely before serving.
Get Roy Schvartzapel's recipe: Open Crumb Panettone

A full-frontal assault on your willpower — this cavernous, tangy chocolate chip panettone pays homage to Roy Schvartzapel's famous open crumb delights. Get the recipe now
Love the photos!